
|
|
ICC Home / Members / Meetings / Peer Support / Documentation / Projects
Return to IT/SA Services Network Documentation

Lead:top |
Chris Leopold |
Overview:top |
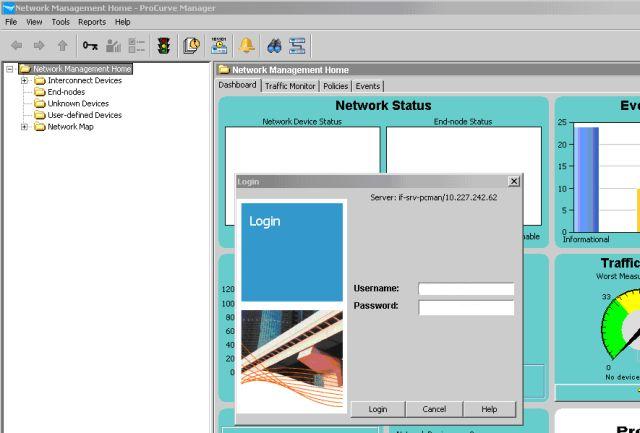
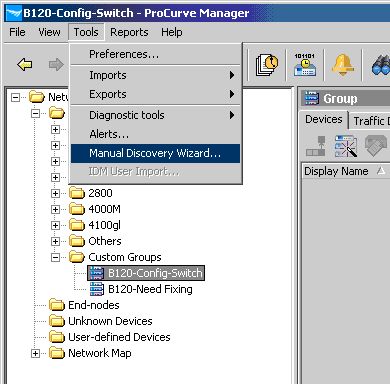
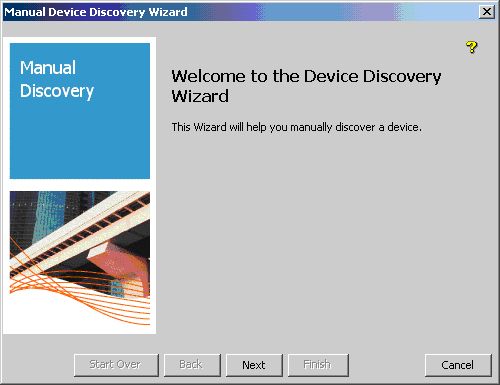
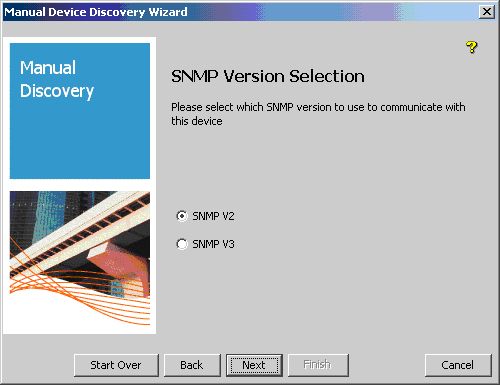
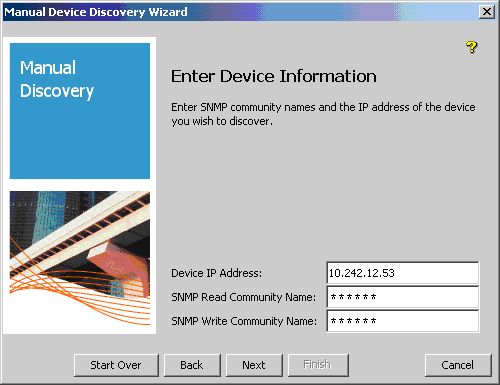
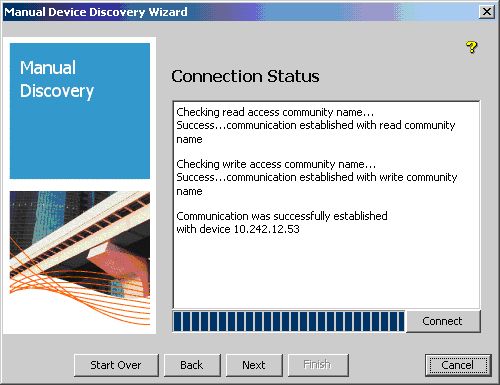
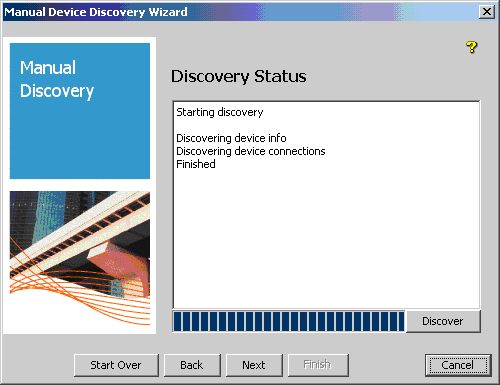
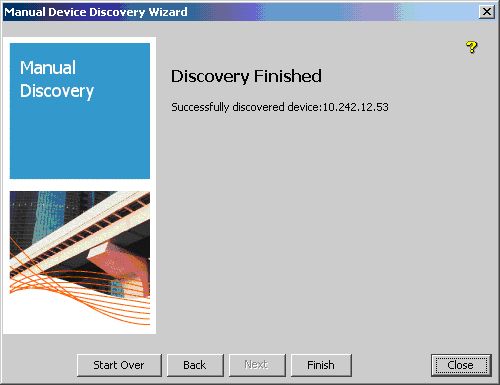
HP ProCurve Manager Plus (PCM+) management software allows for the simple configuration of switches without having to know a great number of the fine details (that is, to avoid perusing the Management and Configuration Guide for the ProCurve Switch 2600 Series). Much of the power of PCM+ comes from the creation of "Custom Groups" to which switches may be added via a GUI. Such groups may be associated with configuration templates and management policies to facilitate setup. This allows an expert to pre-set configurations that those less knowledgable may apply confidently. The first step in using PCM+ is to contact Chris Leopold so he can configure access for you. You should install the PCM+ Remote Client program on a management station that is set to a fixed IP address (via DHCP reservation) so that Chris can allow management access from that machine. You will also be given a username/password for use with the system. The PCM+ Remote Client program may be installed from http://if-srv-pcman.ad.ufl.edu:8040/client/install.htm. Switches may be added to the PCM+ management system via an SMTP discovery process that uses the IP# and the SMNP community names for which the switch is configured. With an unconfigured switch (set to use DHCP and with community names set to "public"), this is extremely simple for those with access to the Building 120 ITSA AD Test Network (VLan 141 IFAS-B120-AD) because the group used for initial switch configuration is set to auto-add devices found on that subnet. For those on other subnets, there is a "Device Discovery Wizard" that asks for the IP# and community names, locates the switch, and adds it to a group based on model. From there, one may add the new switch to the necessary groups in order to apply the templates and security settings as described below. This all means that folks outside the ITSA group will first have to determine the IP number of the switch, and that means connecting to the switch via a serial cable and using a PC with a terminal emulator to access the console program. We will begin our detailed instructions with that procedure. |
Determining the switch IP number:top |
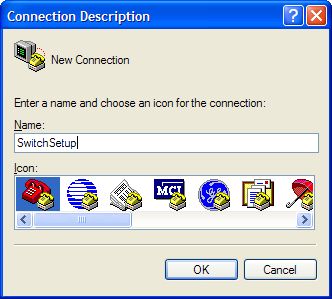
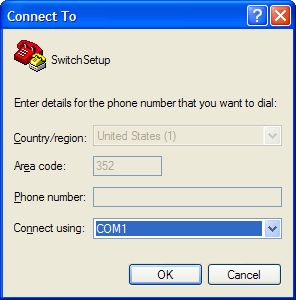
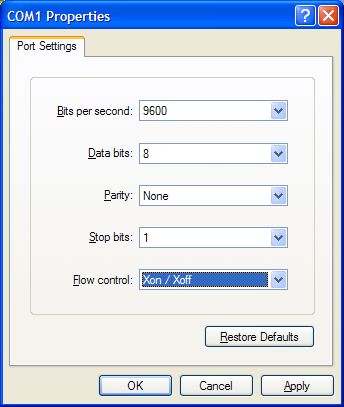
As mentioned, unconfigured switches are set to DHCP and will get an IP# assigned once they are powered up. You may connect to the switch via a serial cable and use the built-in "HyperTerminal" program to access the switch console and determine the IP#. Here are instructions for configuring HyperTerminal:
Once reconnected, press Enter a couple of times to get a console prompt. From there, enter the command "show IP", and you will see the IP number to which the switch has been assigned. With that information, you are now ready to add the switch into the PCM+ management system. |
Adding the switch into PCM+:top |
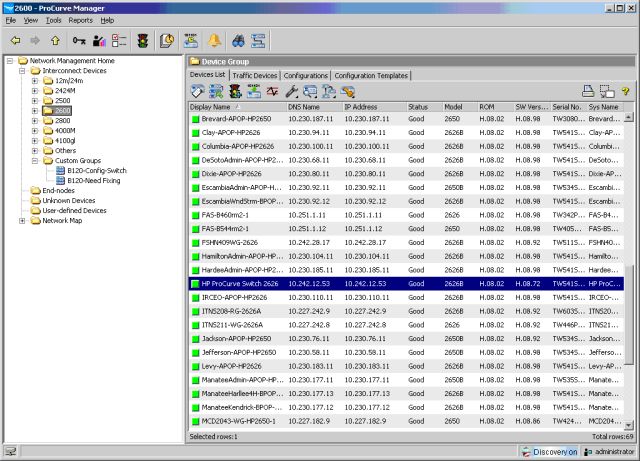
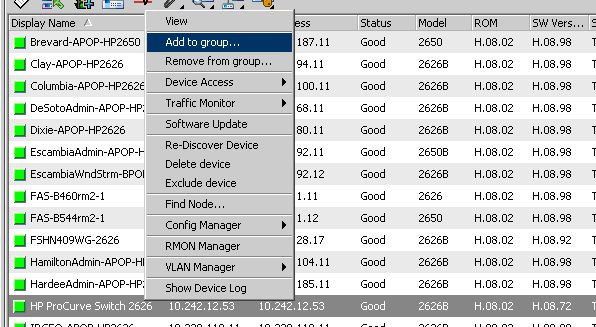
You should now be able to locate the new switch within the appropriate PCM+ group. In the case of these instructions, which were written for the 26xx switches, you should find the new switch beneath Network Management Home > Interconnect Devices > 2600:
|
Adding the switch into the "B120-Config-Switch" custom group:top |
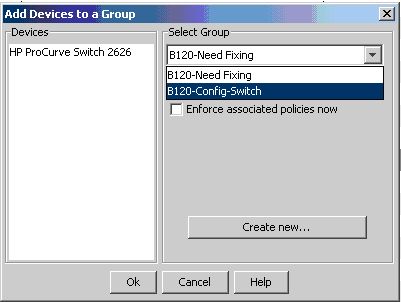
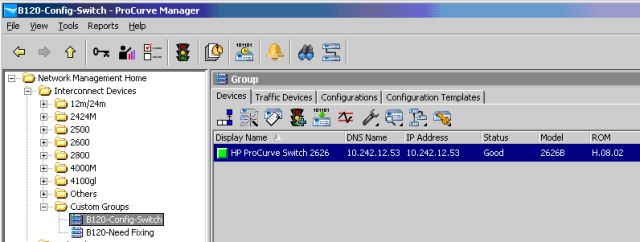
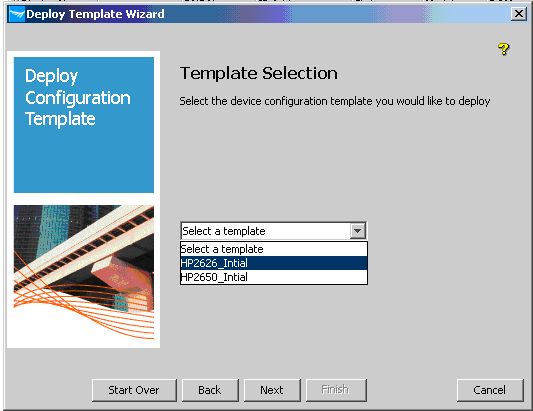
The "B120-Config-Switch" custom group, located in PCM+ within Interconnect Devices\Custom Groups is linked to a couple of configuration templates for the HP2626 and HP2650 model switches. Applying those templates configures a switch with the recommended IFAS intial configuration. First we have to add the switch to that group:
|
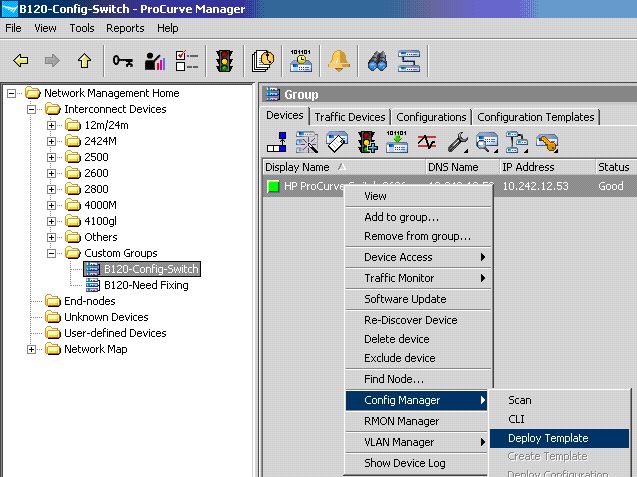
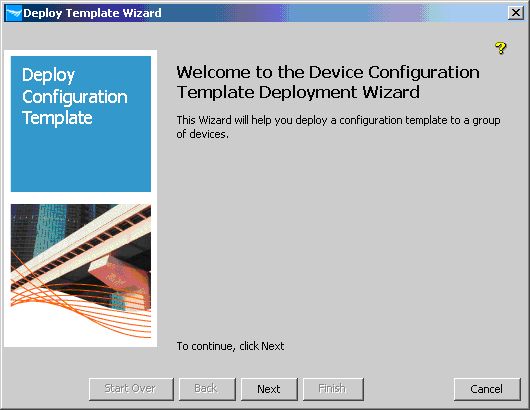
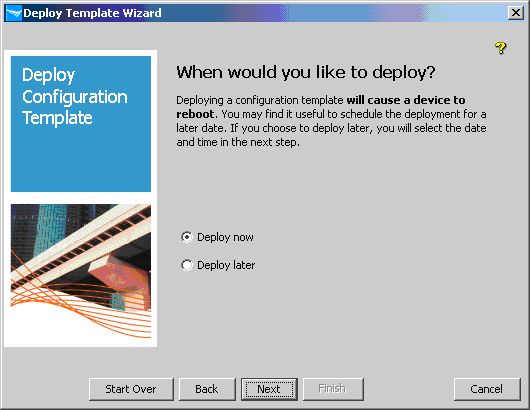
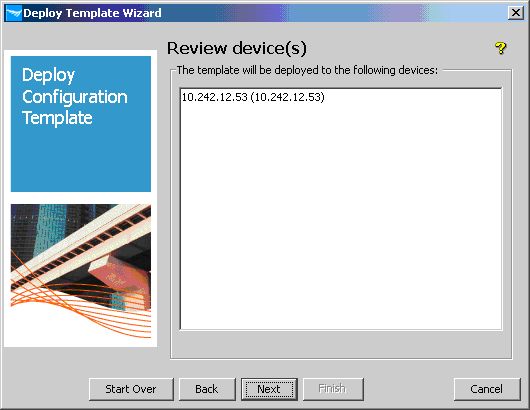
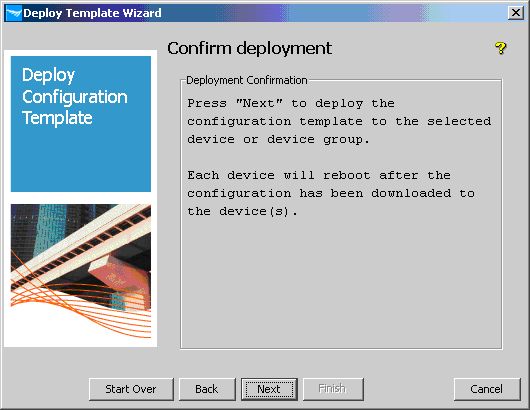
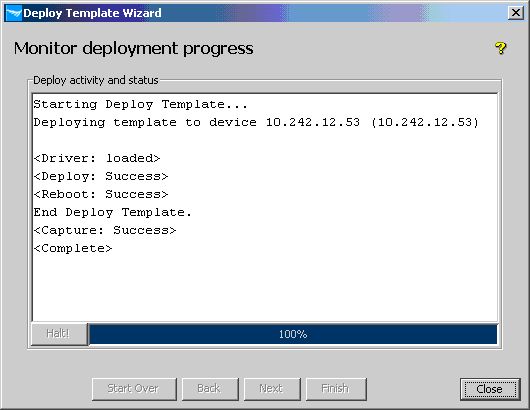
Deploying the initial configuration template:top |
|
Adding the switch into the "B120-Need Fixing" custom group:top |
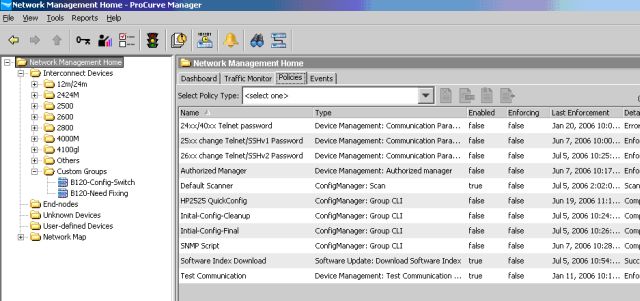
The "B120-Need Fixing" custom group, located in PCM+ within Interconnect Devices\Custom Groups is linked to several management policies that, when applied, perform most of the rest of the basic switch configuration. To enforce the appropriate policies, you must first add the switch to that group:
|
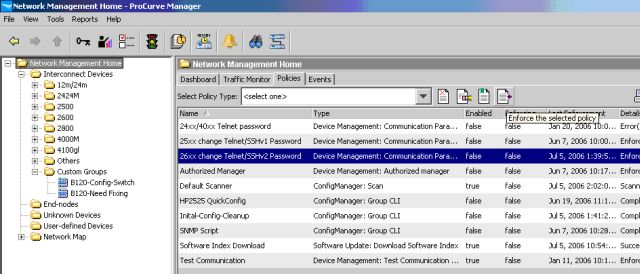
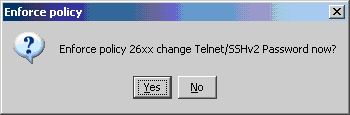
Enforce policies:top |
The "B120-Need Fixing" custom group has two policies that should be applied to better secure the switch. These should be applied in order via the following steps:
|
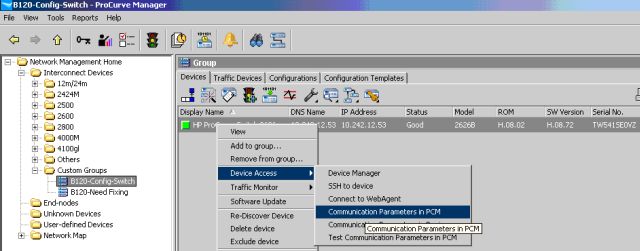
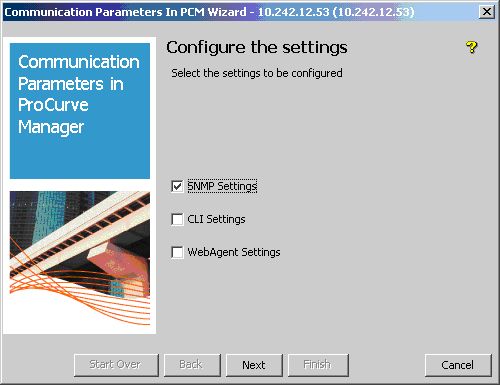
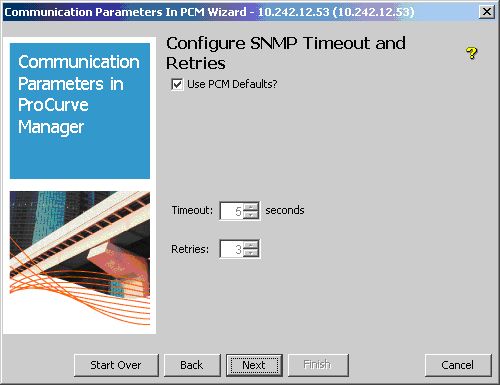
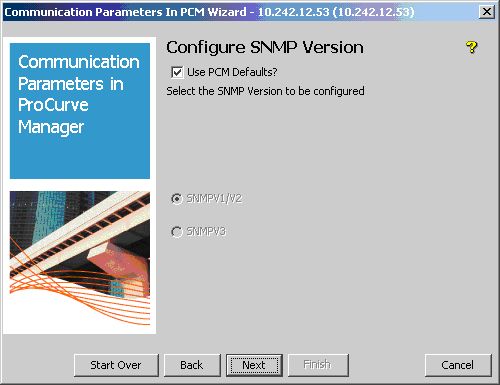
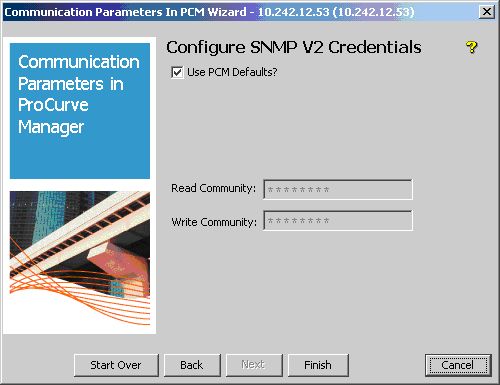
Configuring PCM+ to use the new communication parameters:top |
Now that these policies have been applied, the switch is configured to connect only via SSH and uses a special community name. For PCM+ to communicate, it must be reconfigured:
|
Site specific configuration:top |
The switch is now ready to have the site specific information applied. This will include such things as the Hostname, IP Address, VLAN and SNMP-Server Location. Once that is all accomplished, the switch can be deployed. VLAN configuration will vary with your site. While PCM+ can be used to configure those, it does not permit naming them via the GUI. That can be circumvented, by using the "CLI" command-line interface that PCM+ provides. You may access that by locating your switch, right-clicking on it, and choosing "Config Manager > CLI". You may paste in console command here to reconfigure the switch. As an example, below are the commands used to configure our VLANs (without any actual assignment) at Entomology: config vlan 436 name "Entomology" no ip address exit vlan 453 name "EXT-DEV-Mgmt" no ip address exit vlan 454 name "AuthVLAN" exit write memory |
last edited 12 July 2006 by Steve Lasley